


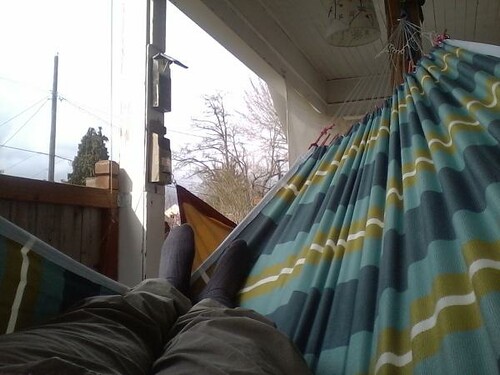
Picture0309142240_1 by bohlmann.eric, on Flickr
Making clews for hammocks is easy. As expected, the first time for anything is slow because you are going into the unknown. But once the basics, and I mean there is only a few basics involved, making clews can become more about creativity and exploration than frustration. Or it can be just following a pattern, nothing wrong that. Derek Hansen has created a wonderful video tutorial on how to create a clew so there is no reason to try and recreate what he has done. Here is a link to his blog post:
http://theultimatehang.com/2013/01/w...clew-tutorial/ .
In this post I would like to share some basic information on creating a jig and information on nettles that shows just how practical it can be to make them. I would also like to challenge any mindsets that clews don't belong on camping hammocks and that they are made with bulky rope. I suspect that as clews are explored a smaller hammock body and clew could increase comfort while decreasing packing size and possibly weight.
The Jig:
The pattern jig:
Mr. Hansen has a simple "picture frame" jig that is great for creating a pattern type clew and there is nothing wrong with that. Follow his instructions and your hammock can become a real slice of heaven.
The adaptable jig:
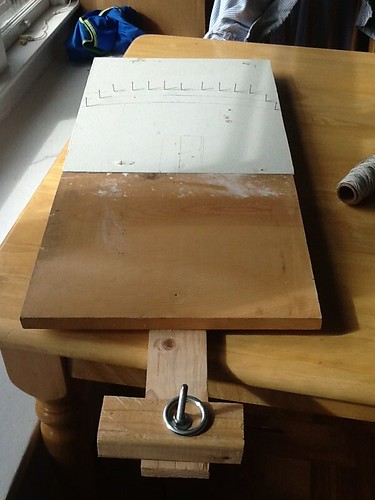
IMG_0000 by bohlmann.eric, on Flickr
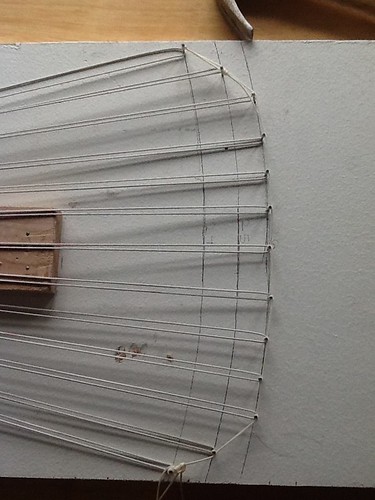
IMG_0841 by bohlmann.eric, on Flickr
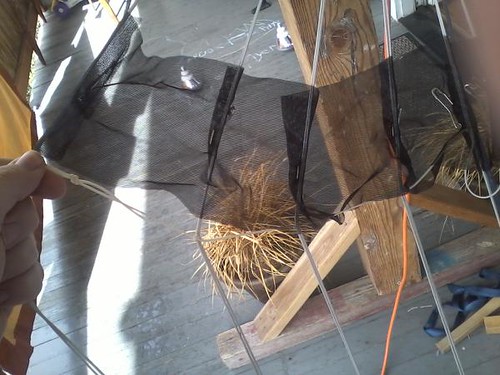
After creating my first clews I decided that I hadn't explored enough how clews can create an amazing hammock. There were two reasons I created this jig. 1. was that I didn't want to go buy wood when I scrap pieces sitting around. 2. I wanted something that would let me create vastly different types of clews without having to make many different jigs. this simple platform jig lets the user place finishing nails anywhere desired. There is a four inch gap between where the ring is placed and the edge of the platform, which makes it easier to weave the clew together.
The width of the platform:
The width of the platform isn't the most important. The question to answer ask oneself is, "Is it wide enough for ease of use?" the distance between each nail won't have an affect on the clew. I have my nails about one inch apart and that is fine for weaving and placing.
Lets have an example. You are creating a clew with 12 nettles and you think one inch between each nettle would be adequate. In this case you would need the platform to be 13 to 14 inches wide. If you are going to use larger diameter rope then you would most likely want the space between each nail to be wider and the platform as well, but not by much.
Length of the platform:
Now this really does matter. The length of the nettles will determine how wide the clew will open. Generally the clew should be the length of half the width of your hammock body. So, if your hammock is 50 inches wide then your nettle needs to be 25 inches long. Your platform needs to be how ever long your nettles need to be plus a few inches. You will notice in the photo that I have a single line of white rope attached to each nail. This helped to stop the nettles from sliding off.
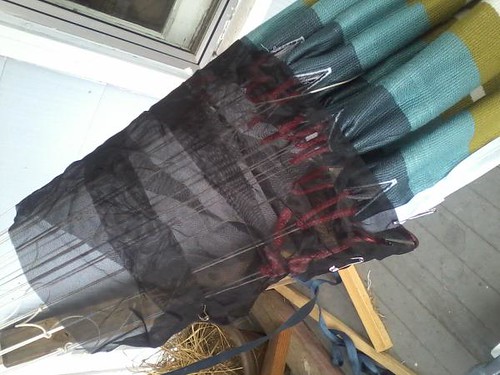
The Clew:
The clew is a real piece of magic for comfort and flexibility. The clew is finished product. Each strand that descends from the weaved area is called a nettle.
The Nettle
The length of the nettles will determine how it affects the hammock. For a basic clew the nettles should be the length of half the width of the hammock. A 50 inch wide hammock should have a 25 inch nettle. But if you want to get even more creative you vary the length of each nettle. This is where creativity can really take hammocks places. Imagine you wanted the distance from the ring to the hammock body to be 10 inches. Each nettle would have to be a different length. If math isn't your thing consider downloading google sketch-up and using it to create your clew. Sketch-up is free.
What to make nettles from:
I used a product called, "The Handy Hundred," and it worked just fine. The weight of the occupant will be divided over the many nettles so a Zing-it or other small ropes can be used. Natural fiber ropes can be used, but are often more bulky than campers and backpackers would like.
Amount of nettles needed:
This is one area I am not sure about. If you use a smaller rope that can hold 100 to 200 pounds then the more nettles you have the better. spacing between each nettle attachment point might determine how many you have. If you are making a camping make sure to account for a nettle being on the outside of the channel on each end. If you use 7/64th amsteel then you might not need as many lines. I have not explored how less lines have impact a hammock and needs to be further explored. I imagine that 12 to 13 nettles would be a good standard to use.
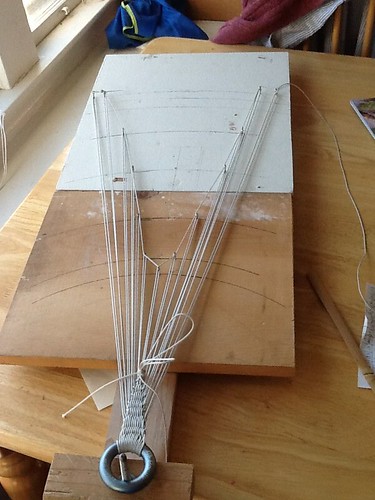
Determining where to place your nettle on the platform:
For the clew to work right your nails need to be placed in order. To figure where your nail needs to go measure a price of rope with a loop at one end the length of the nettle. Leave some extra rope at the end so it can held in place easier. place the rope where it will be attaching to the ring you are using and don't let it move from where you have placed it. Place it in the center of the jig. Place a pencil or pen in the loop, extend the rope to its furthest point and draw a line. Anywhere along the line should be the correct length for your nettles.
If you want to vary the length of each nettle then you will have to make sure you are marking each different length and making sure they are in proper order.
An example, You have a 50 inch wide hammock and want to make a clew that is 10 inches from the ring to the hammock body. The two edge nettles would be 25 inches and the center nettle would be 10 inches. The remaining nettles would be whatever length is necessary to insure that there is 10 inches between the ring and the hammock body.
I have not fully explored how nettle length and ring placement can affect how the hammock lays. What would an ring set to side of the hammock do to how it lays? Imagine making a clew and then turning each nettle into a adjustable loop!
The binding rope:
Since the majority of hammock forum members are interested in camping and backpacking the traditional naval hammock is to heavy, doesn't pack well, and can come apart to easily. One solution is to sew button holes into the end channels so the rope in which the nettles attach to can stay in place. I am going to call this rope the binding rope since it binds the clew to the hammock body. Further the binding rope needs to have loops at the end for the end nettles to attach to. This will stop the rope from pulling out of button holes. Make the rope the length of the width of the hammock. I have not explored shorter lengths for the binding rope.
The binding rope ends:
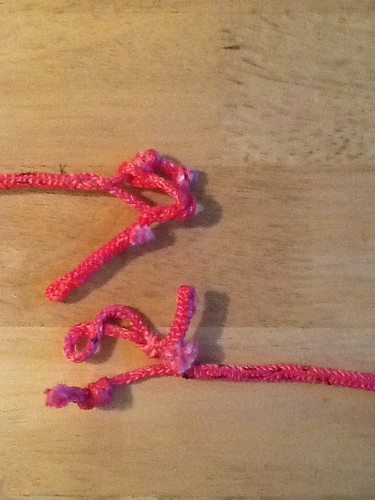
IMG_0829 by bohlmann.eric, on Flickr
Make an adjustable locked brummel at each end. Further down the rope splice in a line with a knot at end facing the locked brummel. I sewed the slice because it was the easiest solution. Thank you Dedominick for that suggestion. This will give you a loop that can be opened for the nettle rest in and be closed so it won't slip out. There is probably many ways to make the end, but that's what seemed the best to me.
Fear of tangles:
If you are worried about the clew tangling then consider attaching a piece of no-seem-netting or fabric between the nettles. This should stop the clews from tangling. Another option would be to make a shell around the entire clew.
Future things to discover:
-How small of a hammock body could be used with clues and still get maxim comfort?
-How small of a clew can be created?
- How would a clew and a hammock body shaped like a parallelogram affect comfort?
-How many clues are necessary?
-Could I make a continuous loop from Amsteel instead of metal ring?
There is a lot of exploring to do with hammocks and roped ends and clews provide a reusable and adaptable way to explore that relationship. I hope this encourages more individuals to give it a try and see what can be done!

 Reply With Quote


Bookmarks