Page 2 of 2 FirstFirst 12
Results 11 to 19 of 19
  1. #11
    Senior Member Mouseskowitz's Avatar
    Join Date
    Mar 2012
    Location
    Stevens Point, WI
    Hammock
    One of my creations
    Tarp
    one of my DIYs
    Insulation
    DIY down or PL
    Suspension
    Something Ti
    Posts
    1,688
    Okay, here are my two thoughts. First, have you considered using snake skins on your fly? You'd have it hung but could wait to deploy it until needed. This would eliminate the need for quick connect and still give you a great view and ventilation, which I'm guessing is the reason behind it.

    Second, I'm wondering if Nite Ize Knotbones would do what you want. They have several pdf documents on their site showing different ways to use them. Look at the advanced app. I'm thinking you could do a center bore off the fly and do a center wrap 360 around the ridge line. The problem I just remembered is that you're using 5mm ridge line, which is way overkill. I'm using 1.75mm on mine. If you want to keep it you'll have to go with the knotbone #6.
    Last edited by Mouseskowitz; 05-09-2012 at 01:30.

  2. #12
    Senior Member Camper1's Avatar
    Join Date
    Oct 2011
    Location
    Victoria, Australia
    Hammock
    Clark NX-250 Camo
    Tarp
    Clark Vertex Camo
    Posts
    100
    Quote Originally Posted by Mouseskowitz View Post
    Okay, here are my two thoughts. First, have you considered using snake skins on your fly? You'd have it hung but could wait to deploy it until needed. This would eliminate the need for quick connect and still give you a great view and ventilation, which I'm guessing is the reason behind it.

    Second, I'm wondering if Nite Ize Knotbones would do what you want. They have several pdf documents on their site showing different ways to use them. Look at the advanced app. I'm thinking you could do a center bore off the fly and do a center wrap 360 around the ridge line. The problem I just remembered is that you're using 5mm ridge line, which is way overkill. I'm using 1.75mm on mine. If you want to keep it you'll have to go with the knotbone #6.
    youve given me some good things to think about there much appreciated
    Clark NX-250, Warbonnet Superfly, Custom made Down, Underground Underquilt. DIY Suspension & Continuous Ridgeline.

  3. #13
    Senior Member Harstad's Avatar
    Join Date
    Jul 2008
    Location
    Harstad, Norway
    Hammock
    Wbbb 1.7 dbl
    Tarp
    Superfly
    Insulation
    Down UQ & TQ
    Suspension
    Webb & buckl.
    Posts
    158
    Images
    7
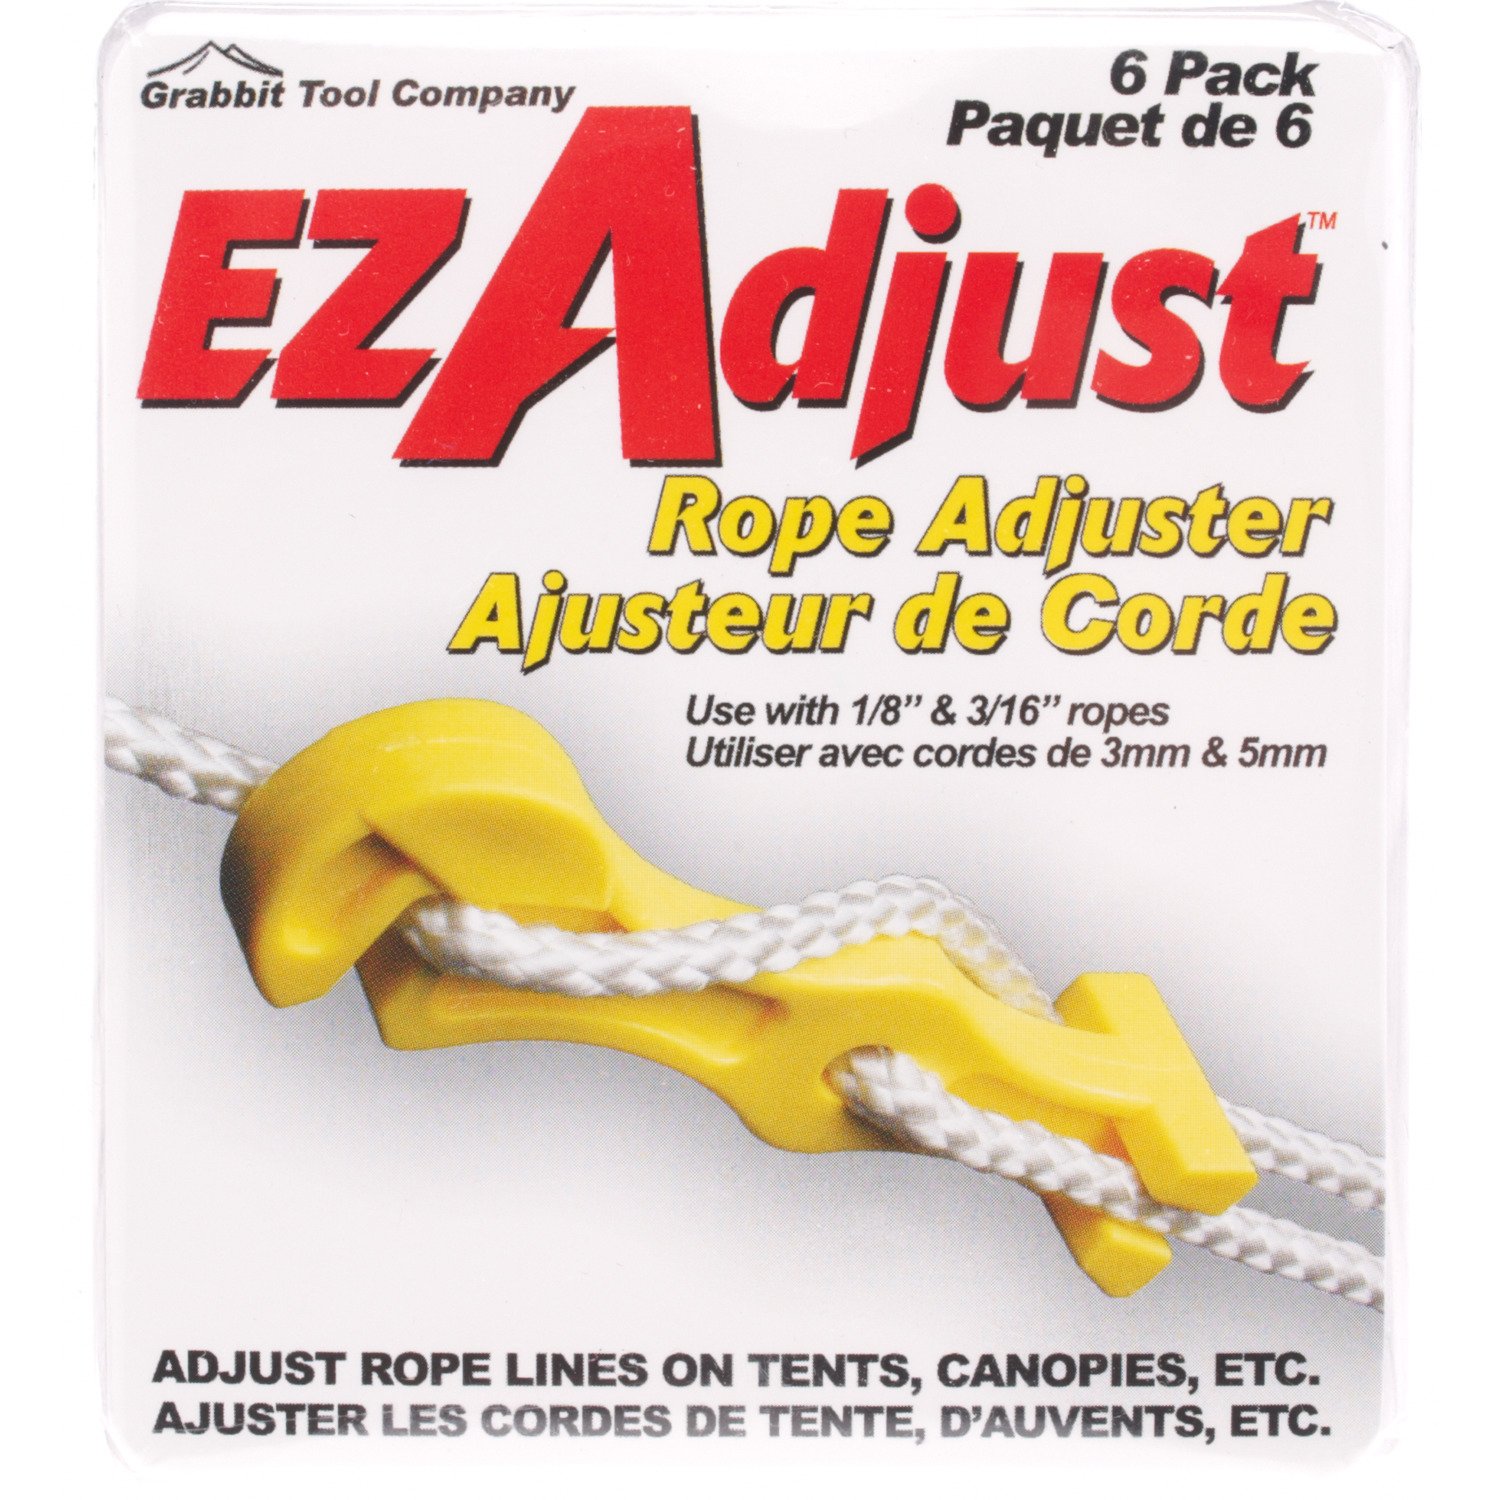
    Are you looking for something like these?
    Looks like they are intended to adjust rope lines lenght, but it would be possible to tie it to the tarp and then connect it to a rigdeline.

    http://www.academy.com/webapp/wcs/st...481+4294962799


    If I die, my biggest fear is that my wife will sell my gear for what I told her I paid for it.

    I am learning from my mistakes, so I can make better and bigger mistakes.

  4. #14
    Senior Member Camper1's Avatar
    Join Date
    Oct 2011
    Location
    Victoria, Australia
    Hammock
    Clark NX-250 Camo
    Tarp
    Clark Vertex Camo
    Posts
    100
    thanks Harstad, they are similar to what i use to tie off the ridgeline already, i was mainly looking for something smaller and lighter that is a quick clip on off, i might have to make something up, thanks
    Clark NX-250, Warbonnet Superfly, Custom made Down, Underground Underquilt. DIY Suspension & Continuous Ridgeline.

  5. #15
    Senior Member ShellD's Avatar
    Join Date
    Mar 2011
    Location
    Greenville,SC
    Hammock
    Dutchware netless
    Tarp
    HG Dyneema
    Insulation
    HG 3S
    Suspension
    Whoopies/Webbing
    Posts
    137
    You could use the small S-Biners. I use them on my under quilts and they weigh practically nothing. You can pick them up and most any sporting goods. +1 on the snake skins.

  6. #16
    Senior Member Camper1's Avatar
    Join Date
    Oct 2011
    Location
    Victoria, Australia
    Hammock
    Clark NX-250 Camo
    Tarp
    Clark Vertex Camo
    Posts
    100
    Quote Originally Posted by ShellD View Post
    You could use the small S-Biners. I use them on my under quilts and they weigh practically nothing. You can pick them up and most any sporting goods. +1 on the snake skins.
    thanks, i can see how they could attach to the tarp end, but how would they clip to the rope without another attachment point on the rope?
    Clark NX-250, Warbonnet Superfly, Custom made Down, Underground Underquilt. DIY Suspension & Continuous Ridgeline.

  7. #17
    New Member waterman's Avatar
    Join Date
    Mar 2012
    Location
    Wilsonville, Alabama
    Hammock
    HH SAFARI ASYM DELUXE
    Tarp
    HH HEX
    Insulation
    pad :(
    Suspension
    whoopie slings
    Posts
    16
    Quote Originally Posted by old4hats View Post
    I use a continuous ridge line with a prussic loop at each end and a small #1 nite- ize "s" biner on each to clip the fly loops to. Works well, easy to use, inexpensive. This allows about any adjustment necessary. Hope this helps. As a side not, some shock cord tensioners on the tie outs work wonders.
    This is my setup also. Works good. Cheap too.

  8. #18
    New Member
    Join Date
    Feb 2012
    Location
    VA
    Hammock
    WBRR and HH Exp Deluxe
    Tarp
    Cloudburst, HH Hex
    Insulation
    Thermarest/MMSS
    Suspension
    Whoopie/DutchBiner
    Posts
    40
    I have recently overhauled my tarp setup and believe I had a similar need as you have described. I wanted a ridge line that would be modular, so I could use any tarp, wether hammock camping or not. I also wanted a lot of versatility and adjustability to work with any type tarp.

    I will post some pics soon but this is what I decided to go with.


    3 Dutch hooks
    1 Dutch stingerz
    42 ft section of zing-it
    4 small loops for prussik knots


    On one end of the 42 ft section I secured a Dutch hook so attaching to the first tree was very simple. I then have one of the new stingerz attached to the other end that allows the simplicity of a small carabiner with a very quick adjustability on the second tree. I then add 2 prussiks to the ridge line and affix a hook to each. This will attach through a tie-out of a tarp and clip onto itself (or a loop already placed on one of the tie-outs). The only other addition I made was 2 prussik attachments by where the trees would be that would be used to affix the anchor points to vary tarp height or allow the hammock's suspension to hang in the space created to avoid any issues woth hanging the tarp ridgeline below the hammocks suspension. It would be easier to explain with a picture but I hope you get the setup I'm trying to describe.

    I then stuff the tarp and everything described above in a speed bag from jacks r better. It is basically exactly what you described...a bag with 2 draw strings on wither end.

    I'm away for a couple days but I will try to get everything in a pic for you if you would like. I use the basic ridge line if Im ground camping or hammock camping. It is a super lightweight and modular setup that I think you would enjoy.

    Hope that helps!

  9. #19
    Senior Member Camper1's Avatar
    Join Date
    Oct 2011
    Location
    Victoria, Australia
    Hammock
    Clark NX-250 Camo
    Tarp
    Clark Vertex Camo
    Posts
    100
    Quote Originally Posted by BlackTalon View Post
    I have recently overhauled my tarp setup and believe I had a similar need as you have described. I wanted a ridge line that would be modular, so I could use any tarp, wether hammock camping or not. I also wanted a lot of versatility and adjustability to work with any type tarp.

    I will post some pics soon but this is what I decided to go with.


    3 Dutch hooks
    1 Dutch stingerz
    42 ft section of zing-it
    4 small loops for prussik knots


    On one end of the 42 ft section I secured a Dutch hook so attaching to the first tree was very simple. I then have one of the new stingerz attached to the other end that allows the simplicity of a small carabiner with a very quick adjustability on the second tree. I then add 2 prussiks to the ridge line and affix a hook to each. This will attach through a tie-out of a tarp and clip onto itself (or a loop already placed on one of the tie-outs). The only other addition I made was 2 prussik attachments by where the trees would be that would be used to affix the anchor points to vary tarp height or allow the hammock's suspension to hang in the space created to avoid any issues woth hanging the tarp ridgeline below the hammocks suspension. It would be easier to explain with a picture but I hope you get the setup I'm trying to describe.

    I then stuff the tarp and everything described above in a speed bag from jacks r better. It is basically exactly what you described...a bag with 2 draw strings on wither end.

    I'm away for a couple days but I will try to get everything in a pic for you if you would like. I use the basic ridge line if Im ground camping or hammock camping. It is a super lightweight and modular setup that I think you would enjoy.

    Hope that helps!
    yer looking forward to seeing the pics, thanks
    Clark NX-250, Warbonnet Superfly, Custom made Down, Underground Underquilt. DIY Suspension & Continuous Ridgeline.

  • + New Posts
  • Page 2 of 2 FirstFirst 12

    Similar Threads

    1. Loop Shackles/Connectors aka The Nacrabiner
      By nacra533 in forum Suspension Systems, Ridgelines, & Bug Nets
      Replies: 387
      Last Post: 08-07-2016, 15:42
    2. Replies: 5
      Last Post: 04-08-2014, 08:04
    3. Tato Tarp Connectors?
      By moshe in forum Dutchware
      Replies: 12
      Last Post: 03-22-2014, 19:13
    4. Exped style guy line connectors
      By VictoriaGuy in forum Do-It-Yourself (DIY)
      Replies: 2
      Last Post: 09-05-2013, 17:29
    5. Dutch Hooks as tarp connectors
      By SGT Rock in forum Dutchware
      Replies: 11
      Last Post: 01-12-2012, 12:20

    Bookmarks

    Posting Permissions

    • You may not post new threads
    • You may not post replies
    • You may not post attachments
    • You may not edit your posts
    •