


Threaded Pipe Hammock Stand V3.2
Disclaimer: This information is provided as-is of what I did and my own reference notes. This is not a how-to manual. Use this information at your own risk. This post became long because I wrote it as I went, so scroll down to see what I ended up with if you do not care about the design and build process.
I set out to build another free-standing hammock stand. I wanted one to replace the bullet proof tank that you see in my avatar pic to the left. I wanted it to be lighter, portable by one person, easy to assemble, and built with no back breaker bar. I also wanted to be able to get parts straight off the shelf and not have to order any. Note that some of my testing would fail other DIY stands on this site. I do not consider my testing overextensive but I like to know that the stand is safe enough for 500 pounds or people to horse around with and not have to worry about it. When DIY, might as well go for overkill.
So we start with a trip to the local home improvement store which has the same galvanized threaded pipe average costs and more of a selection than the local hardware stores. Version 1.0 looked similar to the picture below but did not have the extra bottom pipe structure on the leg crossbars. The upright bar went into a tee and the tee had 45s off each end...same as in the picture below. It became apparent during setup that the legs would swivel and buckle very easily. So I added extra structure to the crossbars. The picture below is Version 1.1 which failed during monkey-bar testing.
It failed and swiveled sideways at the middle tee. The extra piping polygon was used to prevent the bottom bars from buckling (which happened in Version 1.0) but apparently the extra strength could not prevent the middle from moving. I had to redesign it. Also note that in these earlier versions, I was trying to tighten all the pieces as much as I could with a small pipe wrench.
Version 2.0 I never actually assembled because I thought of Version 3 before that was accomplished. Version 2 was essentially an upside-down clothes line. You can view one made by subigo in this other thread: http://www.hammockforums.net/forum/s...606#post289606 I had intended on putting flange feet at the ends off elbows. To prevent stress fractures or stress cracks on the tees as I read about one place, I was going to put a 2 foot support bar, at a 45 degree angle, from one floor end to a 1 1/4 inch tee that the upright bar could slide through. A 1 1/4 inch nipple close would make a nice sleeve and eliminate almost all extra wiggling. I was hesitant on Version 2 because I really could not imagine it being as pretty to look at as Version 1. I was still in denial.
Afterthought: To increase strength of this version without the support bar, 1 1/4 pipe could have been used for the inverted T shape and 1 inch pipe for the risers and ridgline could be dropped into the inverted tee (with nipple extender) for three separate sections.
The only tool I used this whole time was a small pipe wrench that the handle could fit into the 1 inch pipe to be used for leverage, which I used a lot trying to tighten pieces. I ultimately came to the conclusion that I could only get it as tight as my weight and leverage allowed. So if I put a combined 300 pounds of force on it, 301 pounds in the hammock could undo it. The design -had to be secure- without assembly force.
So I came up with version 3.0 based on a picture I saw somewhere of an a-frame made from galvanized threaded pipes. It may have been on this forum but I could not find it again. I did use a pipe wrench to tighten the end tee supports permanently since the eye bolt was going to take the bulk of the weight load. These end tees used 1 inch to 3/8 inch bushing, then a 3/8 inch nipple close. The 8 inch eye bolt was so snug in the 3/8 nipple that I had to manually screw it in. This end tee was a thing to behold.I used a 1/2 inch ridgepole. This version used one inch steel rings with mason line taught between sets of legs to prevent them from sliding apart further during use. However, during the swing test, I realized the legs crept back together during a heavy, fast swing because the weight offset slightly lifted the opposite legs off the ground; Going with wider line could prevent this by offsetting the center of gravity more. I really did not want the a-frame to go out as far as a 90 degree angle since this was going indoors and that would require more space.
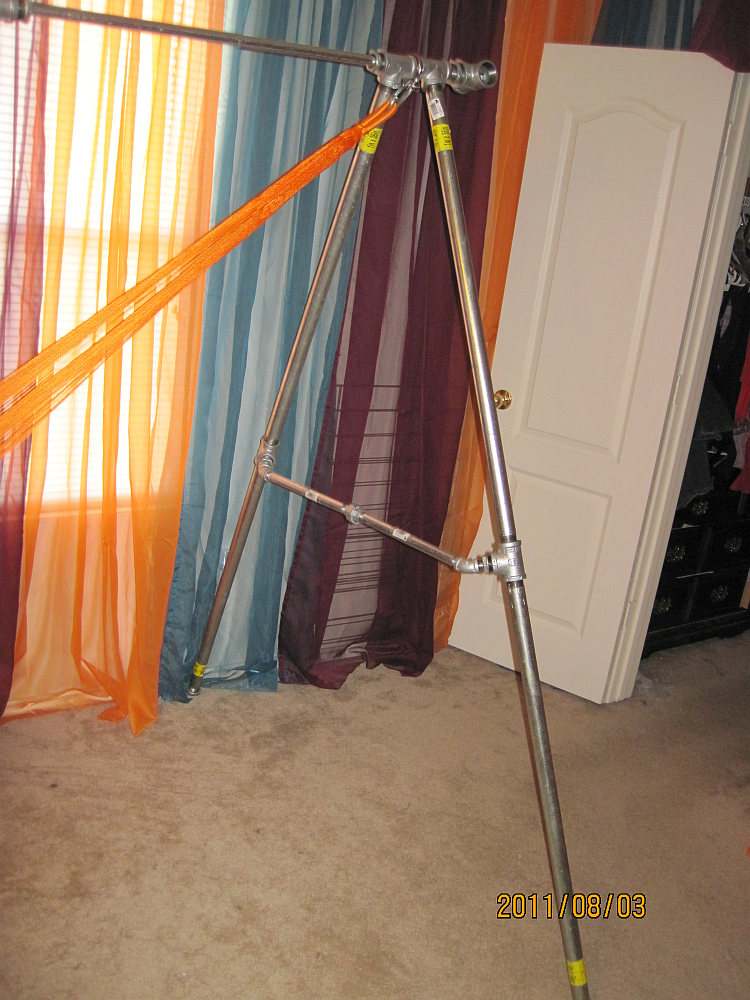
Modifying it to Version 3.1, I decided to go ahead and eliminate this problem by replacing the steel rings and twine with leg braces. Since the loose tees and 45s can swivel, it can be adaptable to different lengths for different footprint angles. These work great! Note that while the leg brace pipes can be shorter or longer to change the footprint of the stand, they will also change the center of gravity during swinging.
It passed pullup monkey bar testing and the swing test, but it failed the sway test. One 1/2 inch coupler came loose from a ridgepole. I guess it worked its way and unscrewed some during testing. At the same time, or on the way down, another piece failed! The whole thing seemed like it was in slow motion as it happened. I fell onto the floor about six inches down (hey, no backbreaker bar!). One of the ends of the ridgepole (still attached to legs) ended up falling straight onto my privates!Luckily, I think another part stopped it from protruding (like a finger pushing) into me beyond about 1mm. A catastophe avoided by help of my guardian angel. This time the double fail was the threading on one end of the ridgepole 1/2 inch pipe into the 1 inch bushing. Apparently the threading area is about half the thickness of the actual pipe and gave way and broke in two. I can not get the threading out to reuse the bushing. If the 1/2 inch threading broke from my one person sway test, I was not sure I trusted 1 inch threading thickness for multiple people (Version 2 was going to use 1 inch ridgepole attached in the same fashion).
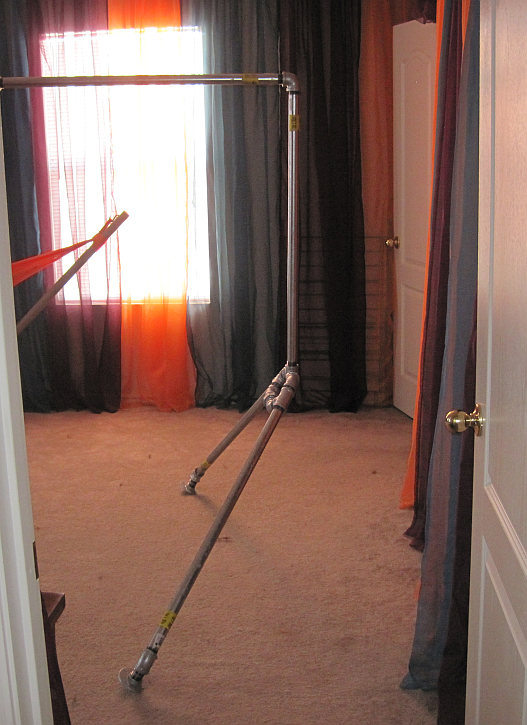
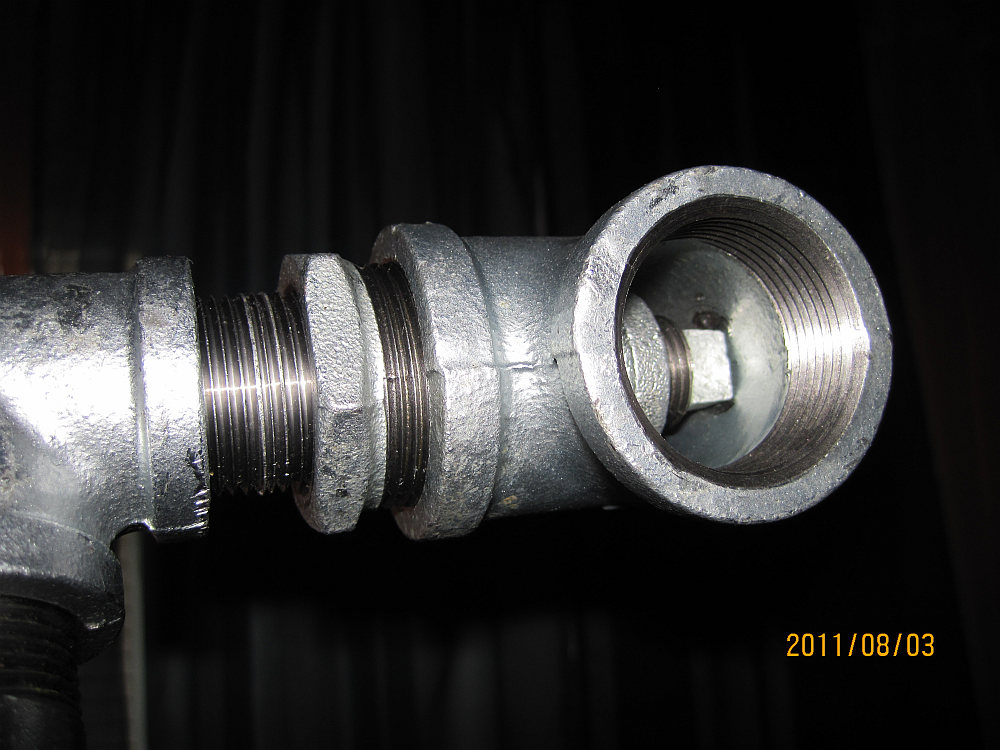
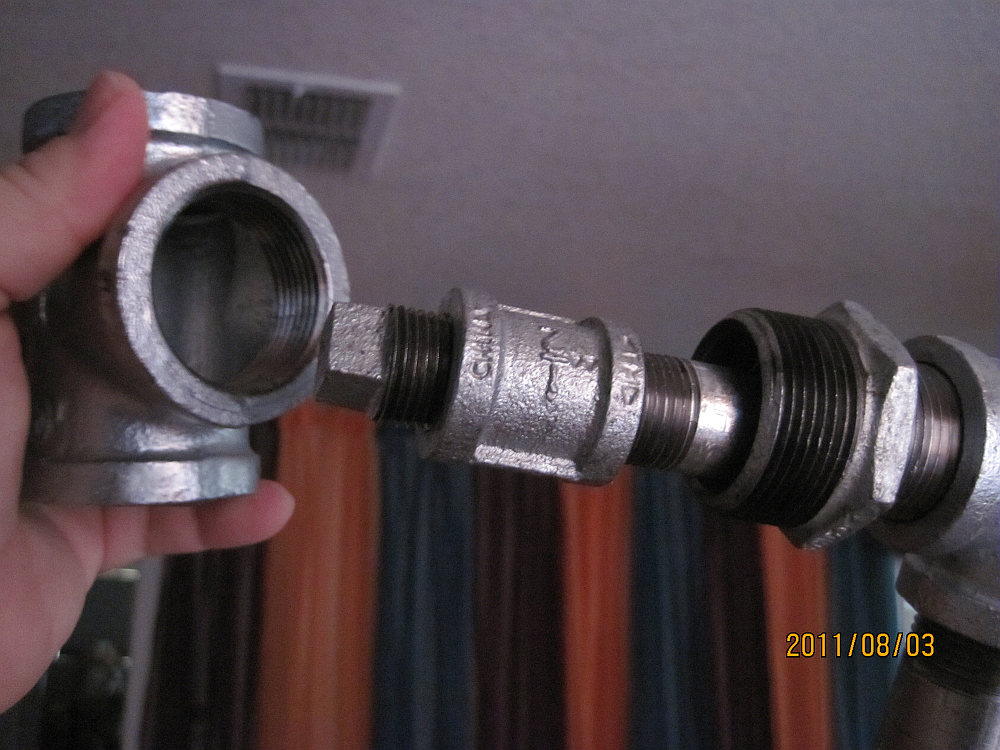
Version 3.2 ended up being the A-Frame displayed in the picture below. I altered the pivot point of sway from the 1/2 inch threads to the pipe diameter with a 1/2 inch end coupler and plug inside the 1 1/4 inch tee on the ends. The inside coupler with plug prevents most movement of the ridgepole in both directions. I also reinforced the ridgepole couplers with a 1 1/4 inch coupler and 1 1/14 inch to 3/4 inch bushings snug on each side. I had to retighten them up slightly by hand after doing side-to-side sway testing. In doing this, I had to eliminate the fantastic looking end tees with eye bolt and switch to a more simpler shackle, which I wish I had thought of originally. I also added a 1 inch to 3/4 inch bushing on the tees to reduce up/down movement on the ridgepole now passing through it. It does still have considerable sway but I think I can trust it now.
Summary:
This version should be supportive enough to assemble with hand tightening only, which should help for no tools to carry with it. As to being portable, I may not have hit the nail on the head with that objective but it does break down and could be carried in a duffle (3 foot duffle?). If thick walled pvc poles could used with removeable pins, maybe this design could be a lot lighter in weight and cheaper.
The *most important* part of this design is to ensure the ridgepole is secure from bending out of the couplers and failing. Looking at different sizes of galvanized threaded couplers, it seems they all only thread the same amount so a larger size may not provide any benefit. However, foregoing portability, a longer single ridgepole will eliminate the problem as used in turtlelady's Bamboo Stand. My stand may suffice with thinner support legs but I will probably never change these pieces again unless I build another one in the future. Maybe one of you or myself will try a pvc version of this someday. I do know that I will probably not try to ever build anything with threaded galvanized pipe again. Kwik Klamp / Kee Klamp fittings would have had this job done a lot quicker but I would have had to cut the pipe and order parts online.
Reference prices reflect my local Lowes and Home Depot, because no dang store can stock 4 of any single galvanized item at once.
Grand Total $298.08 plus tax. Truth be told, I probably spent anotherCode:================================================= My Parts List ================================================= [legs] 1 inch cap (x4) 4 @ 1.88 ( 7.52) 1 inch x 36 inch pipe (x8) 8 @ 12.67 (101.36) 1 inch tee (x8) 8 @ 3.39 ( 27.12) [leg tops] 1 1/4 inch to 1 inch bushing (x2) 2 @ 3.46 ( 6.92) 1 1/4 inch tee (x2) 2 @ 5.95 ( 11.90) 1 inch to 3/4 inch bushing (x2) 2 @ 1.56 ( 3.12) 1 inch nipple close (x2) 2 @ 1.35 ( 2.70) 5/8 stainless steel shackle (x2) 2 @ ~5.00 ( 10.00) (working load 2000lbs) 3/8 in zinc quick link carabiner 2 @ 3.23 ( 6.46) [leg brace] 1 inch to 1/2 inch bushing (x4) 4 @ 2.45 ( 9.80) 1/2 inch nipple close (x4) 4 @ .87 ( 3.48) 1/2 inch 45 degree (x4) 4 @ 1.65 ( 6.60) 1/2 inch x 12 inch pipe (x4) 4 @ 3.13 ( 12.52) 1/2 inch union (x2) 2 @ 5.12 ( 10.24) [ridgepole] 1/2 inch x 36 inch pipe (x4) 4 @ 8.66 ( 34.64) 1/2 inch coupling (x5) 5 @ 1.57 ( 7.85) 1/2 inch plug (x2) 2 @ 1.32 ( 2.64) [ridgepole reinforcements] 1 1/4 inch coupling (x3) 3 @ 4.05 ( 12.15) 1 1/4 inch to 3/4 bushing (x6) 6 @ 3.51 ( 21.06)
100 bucks on the other parts that ended up not getting used in the
final version. I returned what I could. The small pipe wrench ran
about $12 but apparently it is half that at wallymart. I was expecting
a total of a LOT LESS when I started or else I may not have taken it
on. Just looking at the final product does not look like it could
add up to this much but 1/3 of the cost are the legs. I do now have
a fairly heavy duty hammock stand and one that can break down
(not so easily) and moved or travel if need be.
=================================================
Additional Notes
=================================================
Galvanized coating has an icky feel. Quick rub with paper towel.
There is a small amount of grease/oil on the pipe thread from the manufacturer. It does not drip but does contact transfer. Now I have to get the spots out of my carpet.
Hand tighten parts for easier break-down. Make it easier on myself and loosen the tees so they move freely and not tight.
Painting optional. I read somewhere to prep by wiping galvanized parts with vinegar first to clean them. I have not decided on painting yet.


 Reply With Quote
 H.Y.O.H.


Bookmarks