
Originally Posted by
Eidson

This continues to fascinate me. Thank you for taking the time to post all of these details and pictures on this quilt.
I agree with you that this was a brilliant idea. It might not be for everyone, as some may be, for lack of a better word, intimidated by opening their quilt and fiddling with the attachment of additional insulation layers. However, for those who enjoy the diy side of things and don't mind a little fiddling, this would be a great modular quilt. No doubt owning quilts for many temperature ranges is the easiest option, but having a single quilt that is adjustable to your needs or specific outing is a pretty amazing option.
It seems that the quilting loops would be a perfectly easy manner of attaching the layers and like you said, probably doesn't really take that long to do. I know modular quilts have been discussed on the forum before, but this seems to be a much more polished idea. Yes, it would be a little work each time you felt the need to adjust, but I think it could be well worth it for some. All of the climashield I have worked with has that great innate ability to stick to itself well enough that I imagine the basic stitches/threading are plenty to hold it in place, unless of course someone were really rough with it.
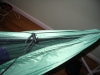
The zippered end is what I didn't originally think of when trying to envision how this worked. A simple, but effective method for sure. I had to laugh at myself for getting trapped in the idea that every quilt has to have cinched ends to keep drafts out. Although I don't knock the helpfulness of the cinched ends on a GE quilt, I do remember times staying plenty warm without them in my older diy quilts. With this being a torso length quilt, I think this even further alleviates any usefulness of having a cinched end and makes the zippered end a completely sufficient method.
Although it grows much more rapidly in size than it ever decreases, a project like this is definitely going on my DIY list. I own quilts that effectively cover the temperature ranges I hang in, but this is a unique one for sure and has just kind of drawn me in. Like I said, it seems more polished than some of the other insulation stacking modular quilt ideas that I have come across before and I could see this being one of those fun projects.


 Reply With Quote


Bookmarks