Page 1 of 2 12 LastLast
Results 1 to 10 of 17
  1. #1
    Senior Member
    Join Date
    Mar 2015
    Location
    Cary, NC
    Hammock
    DIY 11' Airwave w top cover
    Tarp
    DIY silpoly 1.1 XL
    Insulation
    DIY Down
    Suspension
    DIY Whoopie Hooks
    Posts
    200

    Standing French Seam for Tarp Question

    Am planning on building a winter tarp using some 2nd quality 1.1 silpoly XL from ripstop. the fabric looks great and the only imperfections that I have found are a couple extra "globs" of silicon on the shiny side of the fabric.

    My first DIY tarp was a .9 Membrane PU with a flat-felled/french seam hybrid. It looks good on the exterior, except for some wandering straight lines. The interior seam is kind of ugly, but has not leaked after seam sealing.

    I am planning on using a standing french seam that I have seen done by a number of you and looks like what is done on my WB superfly. This method should not require any seam sealing and has a "cleaner" look. However, I am a little confused on the steps required and want a clear plan before I start cutting and sewing

    I have tried to illustrate the steps the attached diagram.

    Here are my questions:

    1. What are the issues with simply attaching the poly ribbon after step 3?

    2. If #1 is not recommended, what about skipping step 4 and attaching the poly ribbon without first enclosing the folded over material?

    any suggestions or advice will be greatly appreciated

    Standing French Seam.jpg
    Malo Periculosam Libertatem Quam Quietum Servitium

  2. #2
    Senior Member kitsapcowboy's Avatar
    Join Date
    Jun 2016
    Location
    Kitsap County, WA
    Hammock
    Dutch/SLD/WB/DIY
    Tarp
    DWG/HG/SLD/UGQ/DIY
    Insulation
    Loco Libre Gear
    Suspension
    Dutchware
    Posts
    3,763

    How To Sew a Standing French Seam Ridge Line with Folded Grosgrain

    The folded grosgrain/standing seam construction has become my preferred method for finishing the ridge line on a two-piece hammock tarp, for the reasons you cited as well as the exceptional strength it provides for your ridge line tie-outs.

    I always sew these ridge lines in three passes:

    1) With right sides touching, sew the first pass of stitches very close (1/4" or less) to the raw edges.

    2) Invert the ridge line seam to bring the wrong sides together and finger-press it smartly; then capture the raw edges inside an exterior standing (French) seam (slightly wider than the first) with a second pass of stitches.

    3) Fold 7/8" to 1.5" grosgrain ribbon over the standing seam and secure it with a third and final row of stitches between the first two passes, biased toward the second pass. (If your tolerances were tight, your third pass will bite through four layers of fabric and still pull the free edges of the ribbon down smartly over the second stitch row in a shingle-like fashion; this is one of the principal virtues of executing this method in three passes instead of two.)

    This method should add no more than 40 grams (and probably less) to your tarp build.

    HTH...
    Last edited by kitsapcowboy; 05-18-2017 at 02:09.
    Smart graphic design for all your needs by BGD

  3. #3
    Senior Member
    Join Date
    Mar 2015
    Location
    Cary, NC
    Hammock
    DIY 11' Airwave w top cover
    Tarp
    DIY silpoly 1.1 XL
    Insulation
    DIY Down
    Suspension
    DIY Whoopie Hooks
    Posts
    200
    OK, I think I have a better understanding.

    the modified illustration
    Standing French Seam.jpg
    Malo Periculosam Libertatem Quam Quietum Servitium

  4. #4
    Senior Member
    Join Date
    Oct 2014
    Location
    New Jersey
    Hammock
    WB XLC DL 1.7
    Tarp
    SuperFly
    Insulation
    Wooki/Mamba
    Posts
    1,902
    Images
    38
    Thank you both for making this so clear. I think if you sew the first seam close you can avoid cutting the excess.

  5. #5
    Senior Member kitsapcowboy's Avatar
    Join Date
    Jun 2016
    Location
    Kitsap County, WA
    Hammock
    Dutch/SLD/WB/DIY
    Tarp
    DWG/HG/SLD/UGQ/DIY
    Insulation
    Loco Libre Gear
    Suspension
    Dutchware
    Posts
    3,763
    Quote Originally Posted by GreatBigDave View Post
    I think if you sew the first seam close you can avoid cutting the excess.
    Exactly; if you use 1.5" grosgrain instead of 7/8" or 1", you give yourself a lot more room for minor variances without challenging the integrity of your finished ridge line seam.
    Smart graphic design for all your needs by BGD

  6. #6
    Senior Member kev138's Avatar
    Join Date
    Jul 2015
    Location
    st. Augustine, Fl
    Hammock
    Diy HyperD grey ghost
    Tarp
    Wb Mamajamba
    Insulation
    Diy
    Suspension
    whoopies straps ms
    Posts
    515
    Images
    16
    Thank you both for this information. I've been contemplating trying my hand at a tarp and been trying to figure out how this type of ridgeline is done. Now I know. Between the explanation and illustration I think I can do it. Gotta love the sharing of knowledge.
    " No sympathy for the devil. You buy the ticket, you take the ride." - Hunter S. Thompson

  7. #7
    SnrMoment's Avatar
    Join Date
    Aug 2010
    Location
    Falling Rock, MT
    Hammock
    DIY
    Tarp
    DIY
    Insulation
    Goose bumps
    Suspension
    Bat Feet
    Posts
    1,439
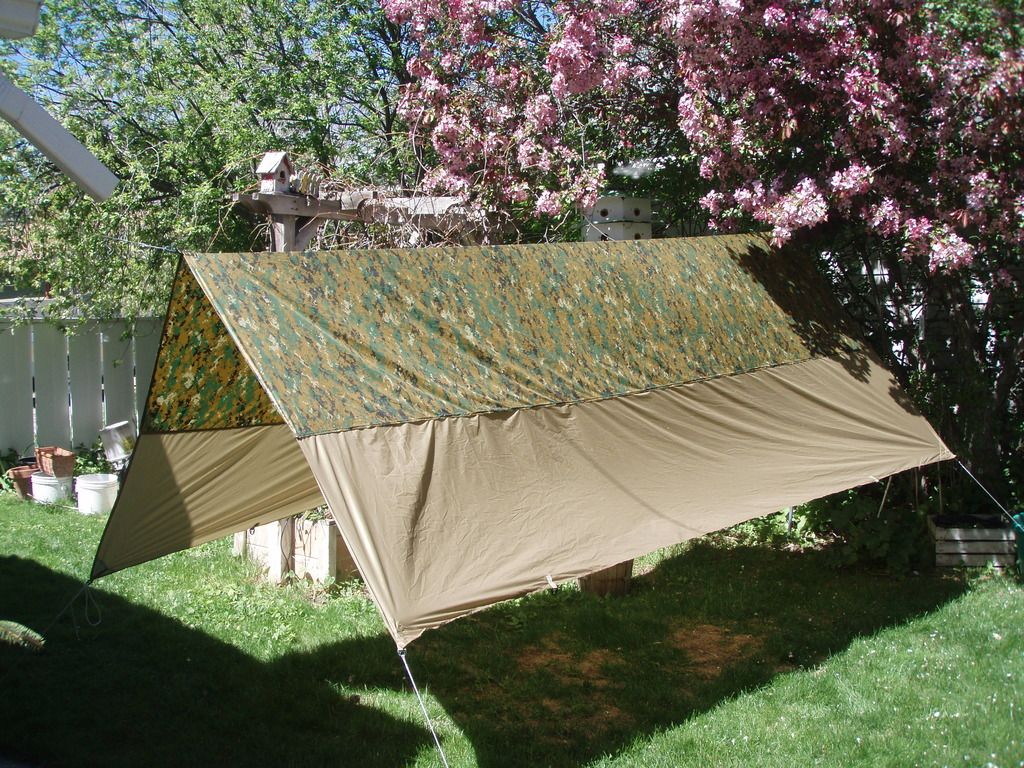
    I do my tarps with a solid one piece panel top, then sew flat felled seams to the sides from a second piece ripped lengthwise. Seam seal the top two pullouts.


    The flat felled seams are laid out so that water drains off the top over the sides like shingles on a roof so it doesn't get trapped in the seam.
    Love is blind. Marriage is an eye opener.

  8. #8
    Phantom Grappler's Avatar
    Join Date
    Mar 2014
    Location
    Denton NC
    Hammock
    WildernessLogics 12x6
    Tarp
    HG cuben 13ridge12
    Insulation
    TopQuiltUnderQuilt
    Suspension
    S and D
    Posts
    4,955
    Quote Originally Posted by SnrMoment View Post
    I do my tarps with a solid one piece panel top, then sew flat felled seams to the sides from a second piece ripped lengthwise. Seam seal the top two pullouts.


    The flat felled seams are laid out so that water drains off the top over the sides like shingles on a roof so it doesn't get trapped in the seam.
    SnrMoment, looks good, looks like no seams directly overhead. I'm not DIY or skilled in tarp building. And I don't know how to draw diagrams and insert them here. What if you had two sides large and wanted to seam near ridgeline?---
    Put them together like two upside down check marks nestled together like spoons. And sew your seams just like in your tarp in your picture. The short end of check marks could be six inches. There would be a two layers of fabric overlapped at ridgeline. Overlapped six inches--the shingle seams would be three inches downhill from ridgeline--any water getting through seam would have to run uphill three inches past ridgeline and downhill three inches to other seam???
    It's great that y'all DIY are making fantastic gear!
    SnrMoment, that's hard to beat--no seams directly overhead on your pictured tarp!


    Sent from my iPhone using Tapatalk

  9. #9
    Senior Member chknbone's Avatar
    Join Date
    Apr 2017
    Location
    Durham, NC
    Hammock
    HyperD 1.6
    Tarp
    Hickery's Favorite
    Insulation
    UQ: HG 20F
    Suspension
    Turtle Ties
    Posts
    164
    I'm starting to work on tarp #2 and got to thinking about the two methods described in this thread....

    What is the advantage of making the third seam go between the first two seams (and having the grosgrain lay over the second seam like a shingle)?

    Wouldn't that just mean that there is the most amount on stress on that second seam that is going just between two (or four) layers of the polysil instead of being on the seam that is going through the grosgrain when the tarp is pulled tight?

    weakestLink.jpg


    Thanks.

  10. #10
    Senior Member MikekiM's Avatar
    Join Date
    Sep 2015
    Location
    East of Montauk, NY
    Hammock
    DIY
    Tarp
    HG DCF-All of them
    Insulation
    HammockGear
    Suspension
    Kevlar + Beckett
    Posts
    4,330
    Images
    21
    I do it the way you've illustrated.. I would agree that the seam that is through four layers would be potentially be the strongest, but I don't use the grosgrain as a structural component on the seam. It's really just to cap the seam and create the shingle over the final seam. That said, I do use the grosgrain as the tie out point on the tarp ridge but the stress is being applied along the length of the grosgrain and on the seams I use to create the eye in the grosgrain.

    Yes, my pack weighs 70lbs, but it's all light weight gear....
    Bob's brother-in-law

  • + New Posts
  • Page 1 of 2 12 LastLast

    Similar Threads

    1. French seam tips?
      By kikoraa in forum Do-It-Yourself (DIY)
      Replies: 14
      Last Post: 04-19-2017, 01:28
    2. Standing French Seam
      By Spark in forum Do-It-Yourself (DIY)
      Replies: 5
      Last Post: 10-26-2015, 11:07
    3. Sewing the French seam?
      By Armor Like Fire in forum Do-It-Yourself (DIY)
      Replies: 14
      Last Post: 08-01-2013, 09:25
    4. Felled Seam vs French Seam
      By 100milerunner in forum Do-It-Yourself (DIY)
      Replies: 26
      Last Post: 01-31-2013, 22:10
    5. Modified french seam
      By wildernessquest1 in forum Do-It-Yourself (DIY)
      Replies: 6
      Last Post: 07-03-2010, 21:38

    Bookmarks

    Posting Permissions

    • You may not post new threads
    • You may not post replies
    • You may not post attachments
    • You may not edit your posts
    •